REALLY WORRIED!
I'm trying the Magic Knot in a few projects just lately, always been very fearful of these teeny tiny knots coming apart so I've resisted using them. This blanket is quite a loose stitch and ends tend to reappear so thought it was time I gave Magic knots a go....fingers crossed they work.
I'm also going to show you a new method of using a start chain....often a tight row that makes your start tight and often your work curve a bit.
THE FLAMING STRIPE THOW
US Terms
10mm Hook
Black for the border only. 100g
Gold for the border 100g
2 Strands dk worked as one
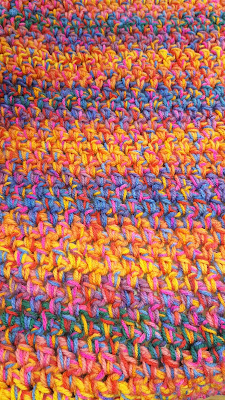
1: A short dye spaced yarn 300g [from Home Bargains]
and
2: A longer dye spaced yarn of similar colouring 300g [Ice yarn rainbow shade]
I'm always buying short dye space yarns and then don't like how they crochet. Working a short dye space yarn with a similar coloured long dye spaced yarn or a plain colour from the first yarn helps to give a smoother transition through the colours.
PATTERN:
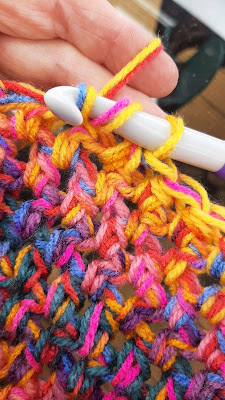
Very simple hdc stitch worked into the spaces NOT THE STITCHES. This will give you the look of moss stitch without doing the chain stitches between.
ch 90
ROW 1: hdc in the 2nd ch, from hook, hdc in the next ch, miss the 3rd, repeat hdc in next 2 sts, miss the next ch, repeat to end of row finishing with hdc, in last 2sts. [60hdc]
ROW 2: WORK INTO THE SPACES only
ch1 turn, hdc in the first and every sp, to the end of the row. [60hdc]
ROW 3 - 100: Repeat Row 2. [60hdc, each row]
EDGING/BORDER
ROUND 1 & 2: IN BLACK, hdc in every sp, hdc ch2 hdc in each corner
ROUND 3: PLAIN COLOUR FROM YOUR CHOSEN SPACE DYED YARN:
hdc in every sp, hdc, ch2 hdc in each corner.
ROUND 4 & 5: IN BLACK, hdc in every st, hdc, ch2, hdc in each corner.
You could leave this throw without a border, it would be the usual to do so. Most multi stranded throws don't have borders, the edges are quite neat and straight.
GIANT POPCORN FLOWERS
I am also adding giant flowers to this blanket, the pattern for these will be added next week, when I've completed the throw and decided exactly where they will go...

ROUND 3: 1popcorn sts, of 5dc, ch2, second popcorn st, in same ch2 sp, ch2, repeat in each ch2 sp. of round below. [12popcorns of 5dc, ch2 between each]
ROUND 4:1 popcorn, ch2, 1popcorn, in the middle ch2 sp, of pairs of popcorn ch2, 1 popcorn, ch2, between pairs of popcorn. [18 popcorn, of 5dc, ch2 between each]
ROUND 5: 1popcorn ch2, 1popcorn in each sp, between pairs, ch2, 1popcorn in next 2 sps, repeat, to end [24 popcorn of 5dc, ch2 between]
ROUND 6: Att. CHARCOAL, for petals.
sc, in first sp, 2sc, in next sp, sc, ch9, sc in next sp, *2sc in next 3sps, sc, ch9 sc, in next sp, repeat from * to end finish with the 2nd sc, in first sp, sl st to complete [2sc in every st, with ch9 in every 4th st]
ROUND 7: cont. in charcoal. 8dc, into the ch9 loop, ch3 picot at the point, 8dc in same loop, sl st, in the sp between 3rd and 4th sc, repeat to end [6 petals of 16 dc, with a ch3 picot at point]


No comments:
Post a Comment