Showing posts with label tr. Show all posts
Showing posts with label tr. Show all posts
Sunday, 16 September 2018


Friday, 10 August 2018
Large Crescent Moon Wrap, grey Cotton/acrylic version today

Grey version of the giant 8' Crescent Moon Wrap with one or two simple changes all in Alize Cotton/acrylic yarn
base pattern with ixed stitch border


Also instead of working into the stitches work into the spaces only for the base pattern will give a different look to your base crescent pattern

Thursday, 9 August 2018
Larger Crescent Moon Wrap....mixed side stitches
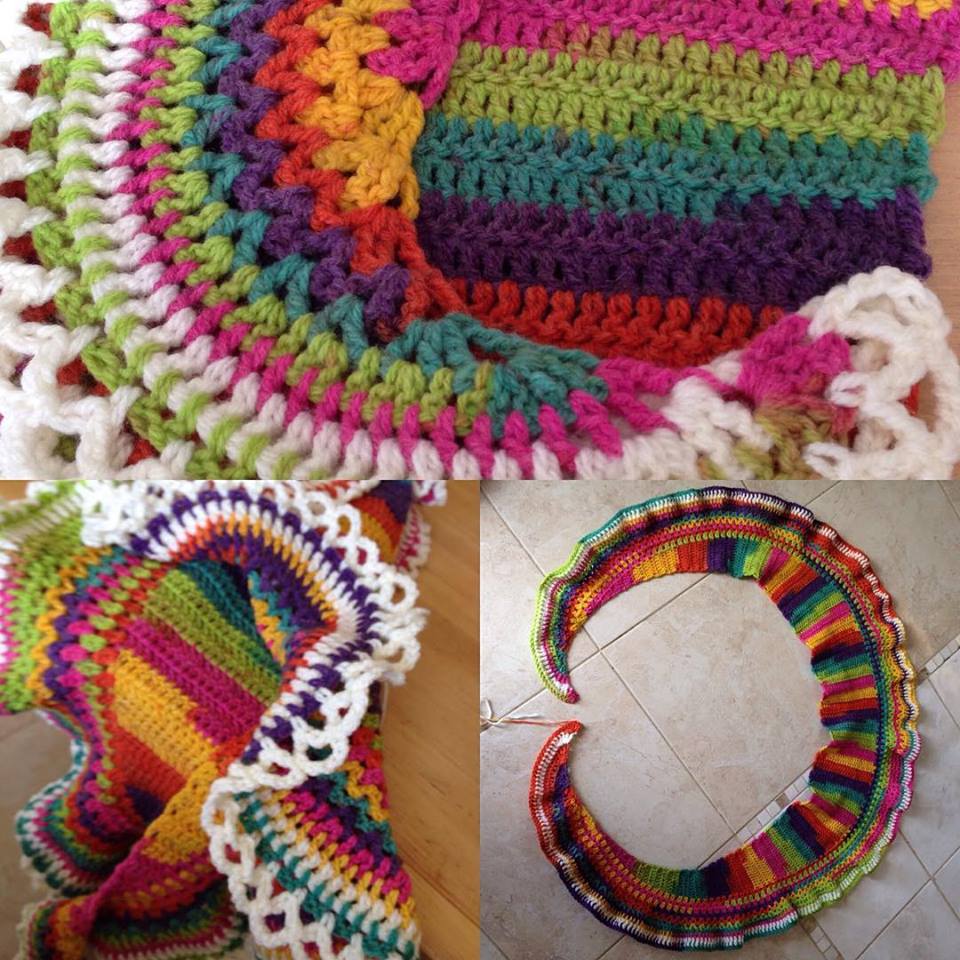
Morning all...well out of all the Crescent Moon Wrap options i think I like this one the best so far. Nothing subtle about it so get those sun glasses out.
DK and cream Aran weights mixed. All with a 4mm hook, its made on the larger base and has several rows of mixed stitches and measures almost 8' long, going to be a real cosy wrap for the Winter

I used 4 x 50g balls of this DK 25% Wool yarn from Wilkinson's in a rainbow of colour and approx. 70g of a cream Aran for the contrast. The wrap weights approx. 270g


DK and cream Aran weights mixed. All with a 4mm hook, its made on the larger base and has several rows of mixed stitches and measures almost 8' long, going to be a real cosy wrap for the Winter

I used 4 x 50g balls of this DK 25% Wool yarn from Wilkinson's in a rainbow of colour and approx. 70g of a cream Aran for the contrast. The wrap weights approx. 270g

Quote from The Power of the Crescent Moon
Crescent Moon should be viewed each month as a potent symbol of where you are giving “birth” to new areas of your life. This is when you welcome your new creation for your life and cradle it to maturity.
LARGER CRESCENT BASE PATTERN
The larger version is the same as the original but increase to 25sts in a row work approx 50cm x 25sts in each row straight, then decrease to 2 sts.
This will make a base for your Crescent Moon wrap approx. 1.5m long before you add the side stitches
Sunday, 23 March 2008
PATTERN: CHRYSANTHEMUM SHOPPER
Chrysanthemum Shopper Pattern
One side and the other I used an extra few colours

Made with my version of a Suffolk Puff
One side and the other I used an extra few colours

Made with my version of a Suffolk Puff
A double layered circluar motif.
 DK in several colours and in Black/Charcoal to finish.

4mm hook
US Terms in black UK Terms in red brackets


CHRYSANTHEMUM SHOPPER PATTERN

Make 5 rows x 5 Chrysanthemums for each side and join as you go on the Charcoal Life last round, 50motifs in total.

PATTERN:
A one finger wrap of 6 wraps
ROUND 1: 12 sc [12dc], into circle


crochet 1tr [1dtr] in every st but cluster every 2trtog, [2dtrtog],


do not pull too tight.


then make the second side joining the same way but making a bag of the motifs start with a bottom corner and join the bottom row first then come up the bag joining as you go
I found that this number was a perfect size for a stool seat pad too


NOTE: By missing a stitch at each dip you will keep the slightly wavy effect to the top of the bag.

STRAPS ROUND 1: Start in the middle of the second motif in from the right
att yarn, ch 70 (this can be lengthened if required),
sc [dc], in st, in the middle of the 4th motif from the right.
NOTE: making sure you haven't twisted the long ch,
sc [dc], in every st, of the next half motif, 2 complete motifs, and the next half motif, missing a st at each dip to keep the wavy effect,


ch70 for the second strap, re-attach in the middle of the 4th motif from the right of the second side and repeat sc [dc],in every st missing a st at each dip. Until you reach the first 70ch st, sl st to complete
STRAPS ROUND 2: 1sc [1dc], in 70ch st, miss a st at the base of strap,
NOTE: Miss a st at the start and end of the strap as you do with the dips, so the change of angle lies flat .

sc in every st missing a st at dips, 1sc [1dc], in 70ch st of second strap, repeat to end, sc [dc], in every st, missing a st at each dip in motifs and at the start and end of each strap. sl st to complete sew in ends securely.
WIDEN YOUR STRAPS?
I Like the narrow straps but you could make them wider if your prefer
repeat STRAPS ROUND 2.
Alternative uses for the Chrysanthemum Motif
Throws or cushions?

FAIRY DUST...


Subscribe to:
Posts (Atom)