Showing posts with label JAYGO. Show all posts

Friday, 24 August 2018

TRIANGLE THROW PATTERN LINK


Originally it was meant to be a throw, 


but i published the wrap version first and never added the throw but here is the throw pattern...eventually got around to sharing it


ORIGINALLY A  WRAP
It's been a well worn wrap, still one of my favourites


A much bigger possible version of the Triangle Throw 

Saturday, 18 August 2018

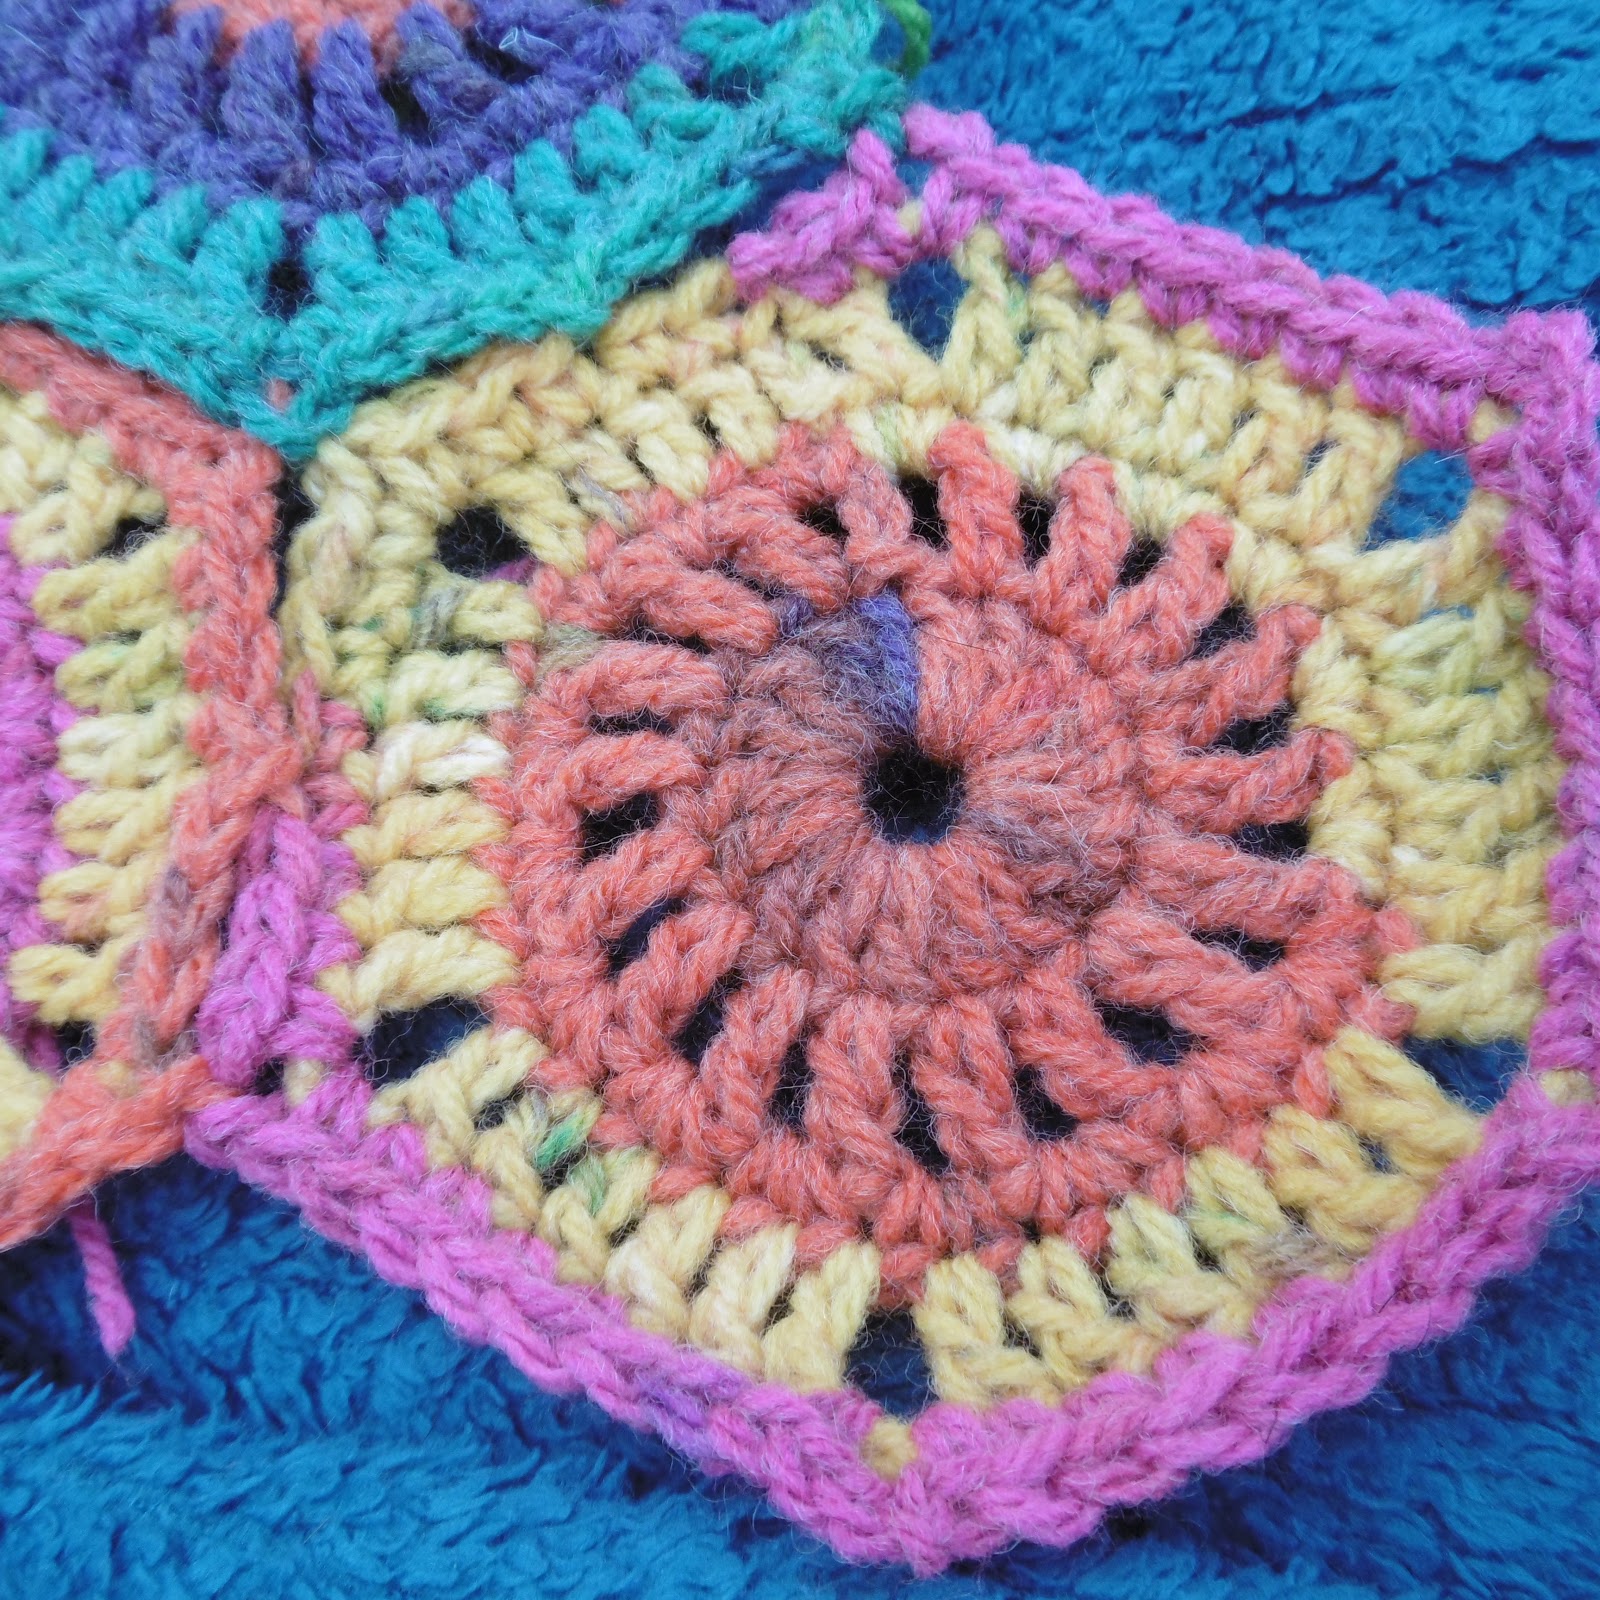
MINI OCTAGON TURNS HEXAGON

NEW HEXAGON WHEEL PATTERN


Finger wrap of 4 wraps.

Round 1: ch2 counts as first dc, 17dc into wrap, sl st, to complete. [18dc]

Round 2: ch3, counts as first dc and ch1 sp, 1dc ch1 in next st, repeat to end, sl st, into first ch3 sp, to complete. [18 spokes]

Round 3: 2sc in each ch1 sp, sl st to complete. [36sc]

Round 4: ch2, counts as first dc, dc in next 5 sts, ch2, dc in next 6sts, repeat to end, sl st, to complete. [6 sides x 6 dc]

Round 5: sc, in each st, sc, ch3, sc, in corner sps, sl st to complete. [8sc each of 6 sides]

JOIN AS YOU GO IN every stitch or just in the corners of in corners and after 4sc stitches.

No in fills required for a Hex pattern 


ORIGIANL OCTAGON PATTERN
An Octagon with an in fill

USA Terms
DK, 4mm Hook
Aran 5mm hook
Chunky 6mm hook or 2 strands of dk

 MINI OCTAGON MOTIF
Magic Circle or finger wrap or Ch6, sl st into a circle.
Round 1: 16 dc into the circle, sl st to complete round.
Round 2: chain 4 as first 'spoke', *dc into next st, ch 2, repeat from * until you have 16 'spokes', sl st to complete round.
Round 3: 2sc in each chain space, sl st to complete round.

Round 4: attach yarn in any stitch, 1dc in the next 4 sts, ch3, 1dc in next 4 sts, sl st to complete round.
Join as you go side by side, will give quite a large 'hole' this can be left or filled with a small square.
Filler Pattern
A very simple granny square of 4dc per side.
Ch4, sl st into a circle.
Round 1: chain 2 as first dc, 3 more dc (4 in total), ch2, sl st though joined motifs, ch2, repeat for all four sides.

Wednesday, 13 February 2008

TRIANGLE WRAP OR THROW


TRIANGLE THROW PATTERN
or Wrap


A ROW OF TRIANGLE TO MAKE A WRAP OR...


a cushion front...

or a blanket...

4mm Hook
Approx. 20g per triangle in 4 colours 


NOTES: These are in Batik dk yarn colours all mix very well together so feel free to combine your own colours.
But any plain yarn would work too 
  Pattern is in US Terms 

 Finger wrap of 5 wraps or ch 4 and sl st into a circle.

ROW1: ch3, 3dc, ch2, 4dc into the circle. Weave in end as you go, so you crochet over the top of them. [4dc each side of point]

ROW 2: ch3 and turn, 3dc into the top of the first dc, 3dc, ch2, 3dc into the ch2 space,  4dc in the sp between the 3rd and last dc. [7dc each side of point]


ROW 3: ch3 turn, 3dc, in first st, 3dc (granny shell) in the next sp, 3dc, 2ch, 3dc in the ch2 point of the triangle, 3dc (granny shell) in the next sp, 4dc in the sp between dc row 10: 31dc, row 11: 34dc row 12: 37dc each side]

ROW 4, 5 and 6: Turn and repeat each round with granny shells in each space, ch 2 at the point of the triangle and 4dc at the beginning an end of each round.

ROW 7: repeat with a 2nd colour change. [22dc each side]
ROW 8: repeat with a 3rd colour change. [25dc each side]
ROW 9 -12: repeat with a 4th colour change. [row 9: 28
ROW12: JOIN AS YOU GO ROUND..join in diagonal strips 
Making 24 triangles [or more if you want a bigger throw]
Join in diagonal rows... 
1st row: just one triangle
2nd row: 3triangles
3rd row: 5 triangles
4th row: 6 triangle
5th row: 5 triangles
6th row: 4 triangle
7th row: 3 triangles
8th row: 1 triangle
you turn from row 11, ch2 turn, sl st into the first st of first triangle, complete the 3dc in the first st, of the second triangle,  st, sl st into the next sp of the first competed triangle, repeat this joining to the point, at the point ch1, sl st into the point of the first triangle, ch1, complete the second 3dc , at the point of the second triangle, continue to complete the second side of the second triangle. 


JOIN AS YOU GO OF STITCH TOGETHER: 


NOTES: Complete the first triangle, then on row 12 of the next triangle, join as you go. point to corner. Using a sl st, between the ch2 at the point [3dc, ch1, sl st, ch1, 3dc], sl st, in every side sp, to join the second triangle to the first triangle.
Repeat The join as you go until you have a diagonal rows of required triangles joined together. 


JOINING STITCH FOR ROWS OF  TRIANGLES
Using joining colour, att yarn in the point of the first triangle, with a sc, ch3, sc in the next sp between the granny shells, ch3, sc in next sp, repeat to end of first panel, sl st to complete, weave in ends securely.

CONT. TO JOIN ROWS OF TRIANGLE INTO A RECTANGULAR THROW
A square could be made instead of a rectangle or a bigger throw just make more triangles
Repeat the same ch3 loop stitches around the second panel, replacing the 2nd ch st, [on the joining side], with a sl st into the matching ch3 loop, joining the 2 panels together on the long side. the 3rd and 4th dc of round 2. [10dc each side of triangle]

EDGING/border:
 It's not necessary to do an edging but if you wanted it a little bigger then rows of granny shells repeated in the same combination of 6 rows in 1st colour, 2 single rows each a different colour and finish with 4 rows of 4th colour.