Showing posts with label squares. Show all posts

Wednesday, 19 July 2017

DAISY CAMPER BLANKET/WRAP...NooNoo is getting a bit of a makeover


About a week ago i gave you a couple of new lacy options for joining squares
I'm using a version of option 3 for a new 

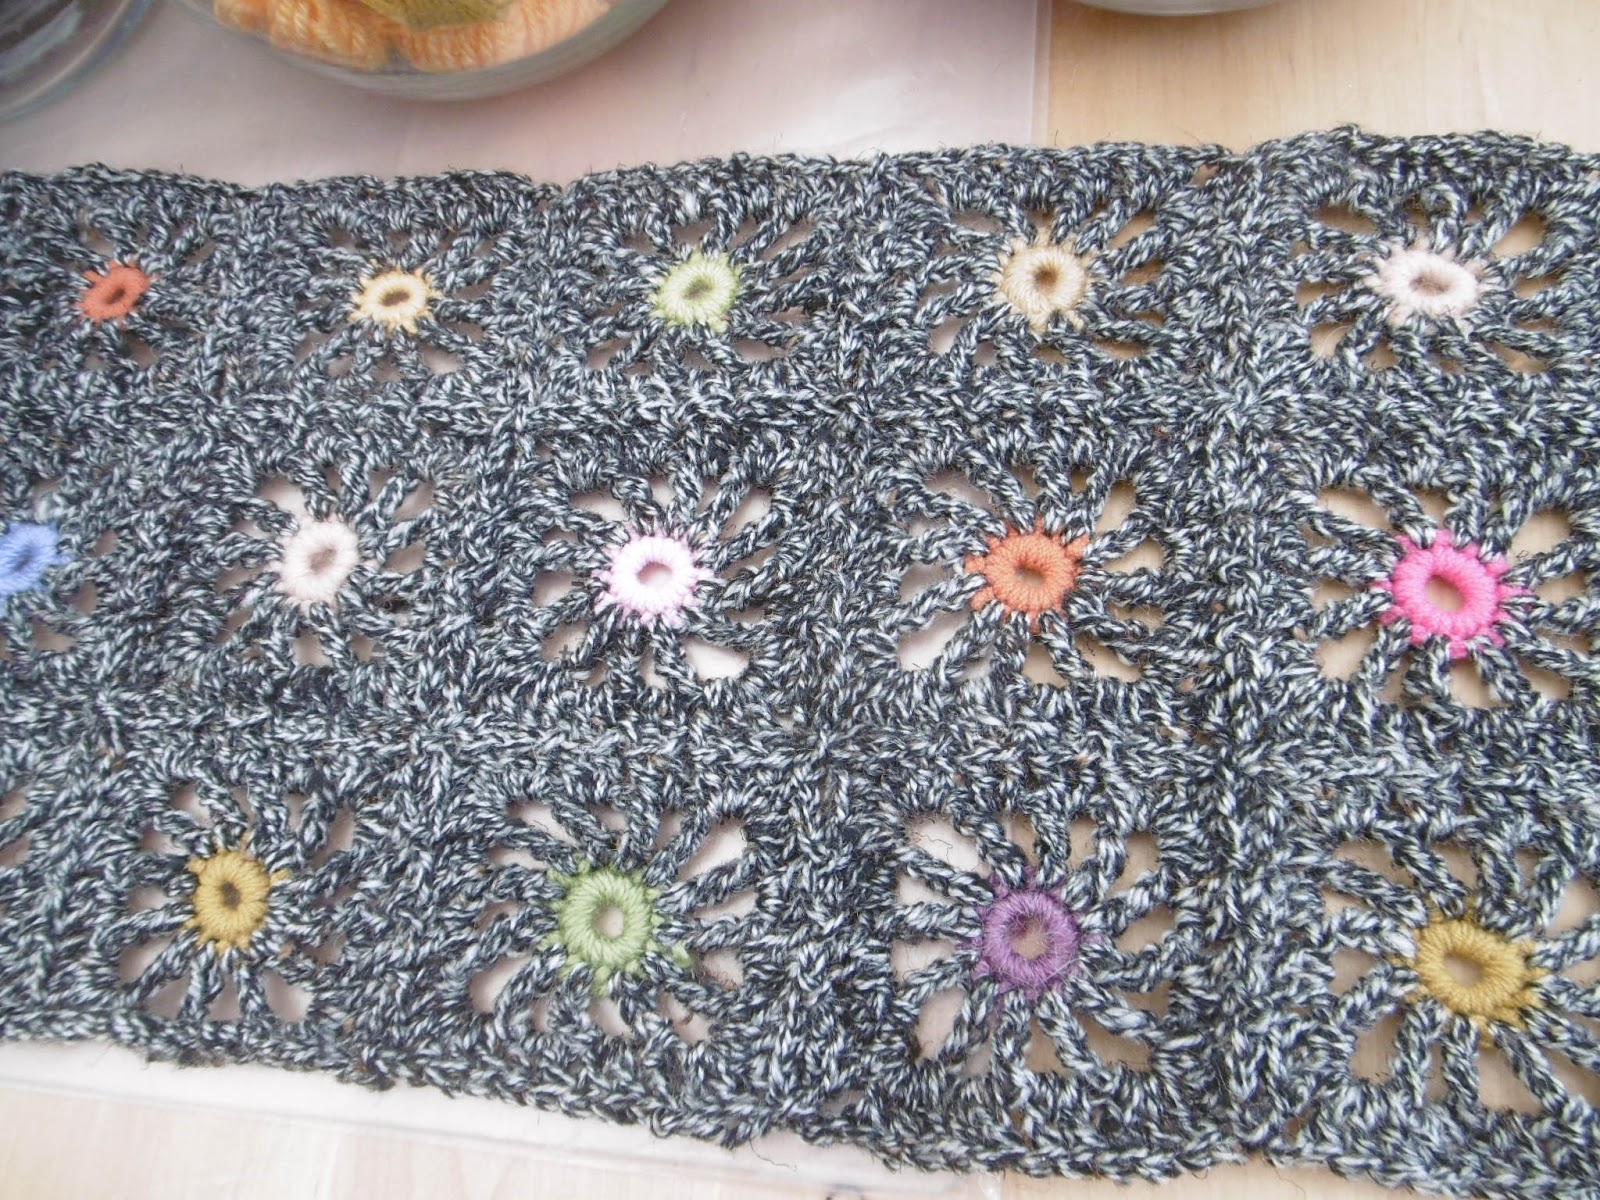
You can see i've changed the centre flower for the New Camper Blanket/wrap, it shows you if you have a 12 section centre you can add this join to any similar square


Daisy Camper blanket/wrap pattern
For now all I have done is a long first row over 6' so perfect length for a wrap to start me off


 Lacy join option 3: 
NooNoo Camper is getting a make over with a new wrap/blanket using the new table cloth as inspiration
I say wrap/blanket because it will be a 6' wrap to start with and grow over time 

 Table Cloth Colours
USING 6 COLOURS
2 Shades of grey, cream, duck egg blue, soft sage green and 2shades of pistachio and ochre DK


I am using dk and a 4mm Hook
But it could be made in Aran and 5mm hook
US Terms 


A  finger wrap of 10 wraps,
Round 1: 12sc into wrap circle, first anchor stitch counts as fist sc, sl st, to complete. [12sc}

 Round 2: 3tr, clusters, in each st, ch2 counts as first, part made tr, 2 more half made tr, yo, pull through all the stitches, ch2, repeat for each st. sl st to complete. [12 petals]

Round 3: att. second col. in any ch2 sp, between 2 petals, ch5 sc in next sp, repeat to end, sl st, to complete. cont. in same col. [12 x ch5 loops]

Round 4: ch 2 counts as first dc, 4dc, ch5 picot, 5dc, in same ch5 loop,[corner],  sc in next ch5 sp, ch5, [side], sc in next ch5 sp, repeat, sl st, to complete. 
[10dc and ch5 loop each side]

Join as you go: use a sl st, replacement for the 3rd ch st in the ch5 picot and the ch5 side loops, complete the first square, then add the next and subsequent squares using the sl st from the front method.


NooNoo is an old man now ,from 1976 Tax exempt VW Late Bay
Looking at his best for the Daughter of a friends wedding a couple of years ago

Thursday, 13 July 2017

Camper Coat, Magic Balls and the 15Minute Rule...

The Camper Coat has grown but not a fast as it should have...3 rows of squares and about half way across the coat at the minute.


WORKROOM SORT OUT
Thanks Chris for starting me off with the sort out,  promise I am using the 15minute rule and doing a little every day but its a huge job and not going as fast as it did while you were here, thats for sure, lol. 
Every box i open i find something interesting that hasn't been complete....just so many projects i want to do and not enough hours in the day so again, its back to the 15minute rule and some more Magic Balls too. HERE to see the original post 


Lots of ends of balls to play with thats for sure...
All sorts of uses for these when you crochet especially when you do motifs and use lots ofsxall quantities to make motifs

I'm using lots in the camper coat only a couple of metres if that in each centre circle in a rainbow of colours


the grey version is using US Terms dc but the black and white tweedy look i settled on was slightly more open and i used US tr.


 join as you go in the spaces only
 a little bit quicker than joining every st.


Definitely more effort needed though to complete this Ruana/Kimono/Jacket for next winter, can you believe we are well into July already? 

and for this wearable item I'm making it sleeveless a bit like a Celtic Ruana, i've been wearing a woven black and oatmeal checked one all last winter and love it.

Simple, wide enough not to need a sleeve and goes over everything  a Ruana really should be open at the sides but mine is going to be stitched up so I suppose it could be a sort of Kimono Style, possibly.

UPDATE ON THE 15MINUTE RULE
 All those unfinished project I have?
Could 'The 15 Minute Rule'
see a project or two finished in a year?...YES, I think it could.

15 MINUTE RULE
PERSONAL CHALLENGE 2016
 Using 'The 15 Minute Rule' complete as many unfinished projects as possible in 2016

I'm sure you all have unfinished projects lurking somewhere and would like to see them completed?
By doing just 15minutes a day on a project we could all see a few finished?

Wednesday, 7 October 2009

KNITTING 4 HEROES COLLAGE


Managed my 1st 3 red white and blue 6" squares for the 'KNITTING FOR HEROES' Giant flag and creative knitting exhibition next June.....PLEASE HELP IF YOU CAN...click the link and join the Ravelry Group or contact Ali via the Union Jack Flag link at the side


Been making lots of Union Jack flag badges and hanging bunting for the shed and house
Needed to trim the poles on the awning and check it was dry for the winter just fits on our small lawn
Never put up the inner sleeping quarters so tried it out...then asked friends at a brill dinner last night...thanks Dave and Alison....to join us on a weekend or two next year...Alison thought it a great idea Dave never said anything hehehe..... fun fun fun
Second coat on the 2 shelf units l made last week and the peg rail...fingers crossed they will be up by the end of today

Thursday, 24 September 2009

PATRIOTIC KNITTING SHOW

Paratrooper Lance Corporal Tom Neathway and Ranger Andy Allen.....2 wonderful guys on the 'WOUNDED' programme last night....fantastic and inspiring guys

Anyone interested in supporting the guys in Afghanistan and you can knit a couple of square or maybe more?.....take a look at this link.....

red white and blue squares wanted to make a Union Jack


Wednesday, 13 February 2008

TRIANGLE WRAP OR THROW


TRIANGLE THROW PATTERN
or Wrap


A ROW OF TRIANGLE TO MAKE A WRAP OR...


a cushion front...

or a blanket...

4mm Hook
Approx. 20g per triangle in 4 colours 


NOTES: These are in Batik dk yarn colours all mix very well together so feel free to combine your own colours.
But any plain yarn would work too 
  Pattern is in US Terms 

 Finger wrap of 5 wraps or ch 4 and sl st into a circle.

ROW1: ch3, 3dc, ch2, 4dc into the circle. Weave in end as you go, so you crochet over the top of them. [4dc each side of point]

ROW 2: ch3 and turn, 3dc into the top of the first dc, 3dc, ch2, 3dc into the ch2 space,  4dc in the sp between the 3rd and last dc. [7dc each side of point]


ROW 3: ch3 turn, 3dc, in first st, 3dc (granny shell) in the next sp, 3dc, 2ch, 3dc in the ch2 point of the triangle, 3dc (granny shell) in the next sp, 4dc in the sp between dc row 10: 31dc, row 11: 34dc row 12: 37dc each side]

ROW 4, 5 and 6: Turn and repeat each round with granny shells in each space, ch 2 at the point of the triangle and 4dc at the beginning an end of each round.

ROW 7: repeat with a 2nd colour change. [22dc each side]
ROW 8: repeat with a 3rd colour change. [25dc each side]
ROW 9 -12: repeat with a 4th colour change. [row 9: 28
ROW12: JOIN AS YOU GO ROUND..join in diagonal strips 
Making 24 triangles [or more if you want a bigger throw]
Join in diagonal rows... 
1st row: just one triangle
2nd row: 3triangles
3rd row: 5 triangles
4th row: 6 triangle
5th row: 5 triangles
6th row: 4 triangle
7th row: 3 triangles
8th row: 1 triangle
you turn from row 11, ch2 turn, sl st into the first st of first triangle, complete the 3dc in the first st, of the second triangle,  st, sl st into the next sp of the first competed triangle, repeat this joining to the point, at the point ch1, sl st into the point of the first triangle, ch1, complete the second 3dc , at the point of the second triangle, continue to complete the second side of the second triangle. 


JOIN AS YOU GO OF STITCH TOGETHER: 


NOTES: Complete the first triangle, then on row 12 of the next triangle, join as you go. point to corner. Using a sl st, between the ch2 at the point [3dc, ch1, sl st, ch1, 3dc], sl st, in every side sp, to join the second triangle to the first triangle.
Repeat The join as you go until you have a diagonal rows of required triangles joined together. 


JOINING STITCH FOR ROWS OF  TRIANGLES
Using joining colour, att yarn in the point of the first triangle, with a sc, ch3, sc in the next sp between the granny shells, ch3, sc in next sp, repeat to end of first panel, sl st to complete, weave in ends securely.

CONT. TO JOIN ROWS OF TRIANGLE INTO A RECTANGULAR THROW
A square could be made instead of a rectangle or a bigger throw just make more triangles
Repeat the same ch3 loop stitches around the second panel, replacing the 2nd ch st, [on the joining side], with a sl st into the matching ch3 loop, joining the 2 panels together on the long side. the 3rd and 4th dc of round 2. [10dc each side of triangle]

EDGING/border:
 It's not necessary to do an edging but if you wanted it a little bigger then rows of granny shells repeated in the same combination of 6 rows in 1st colour, 2 single rows each a different colour and finish with 4 rows of 4th colour.