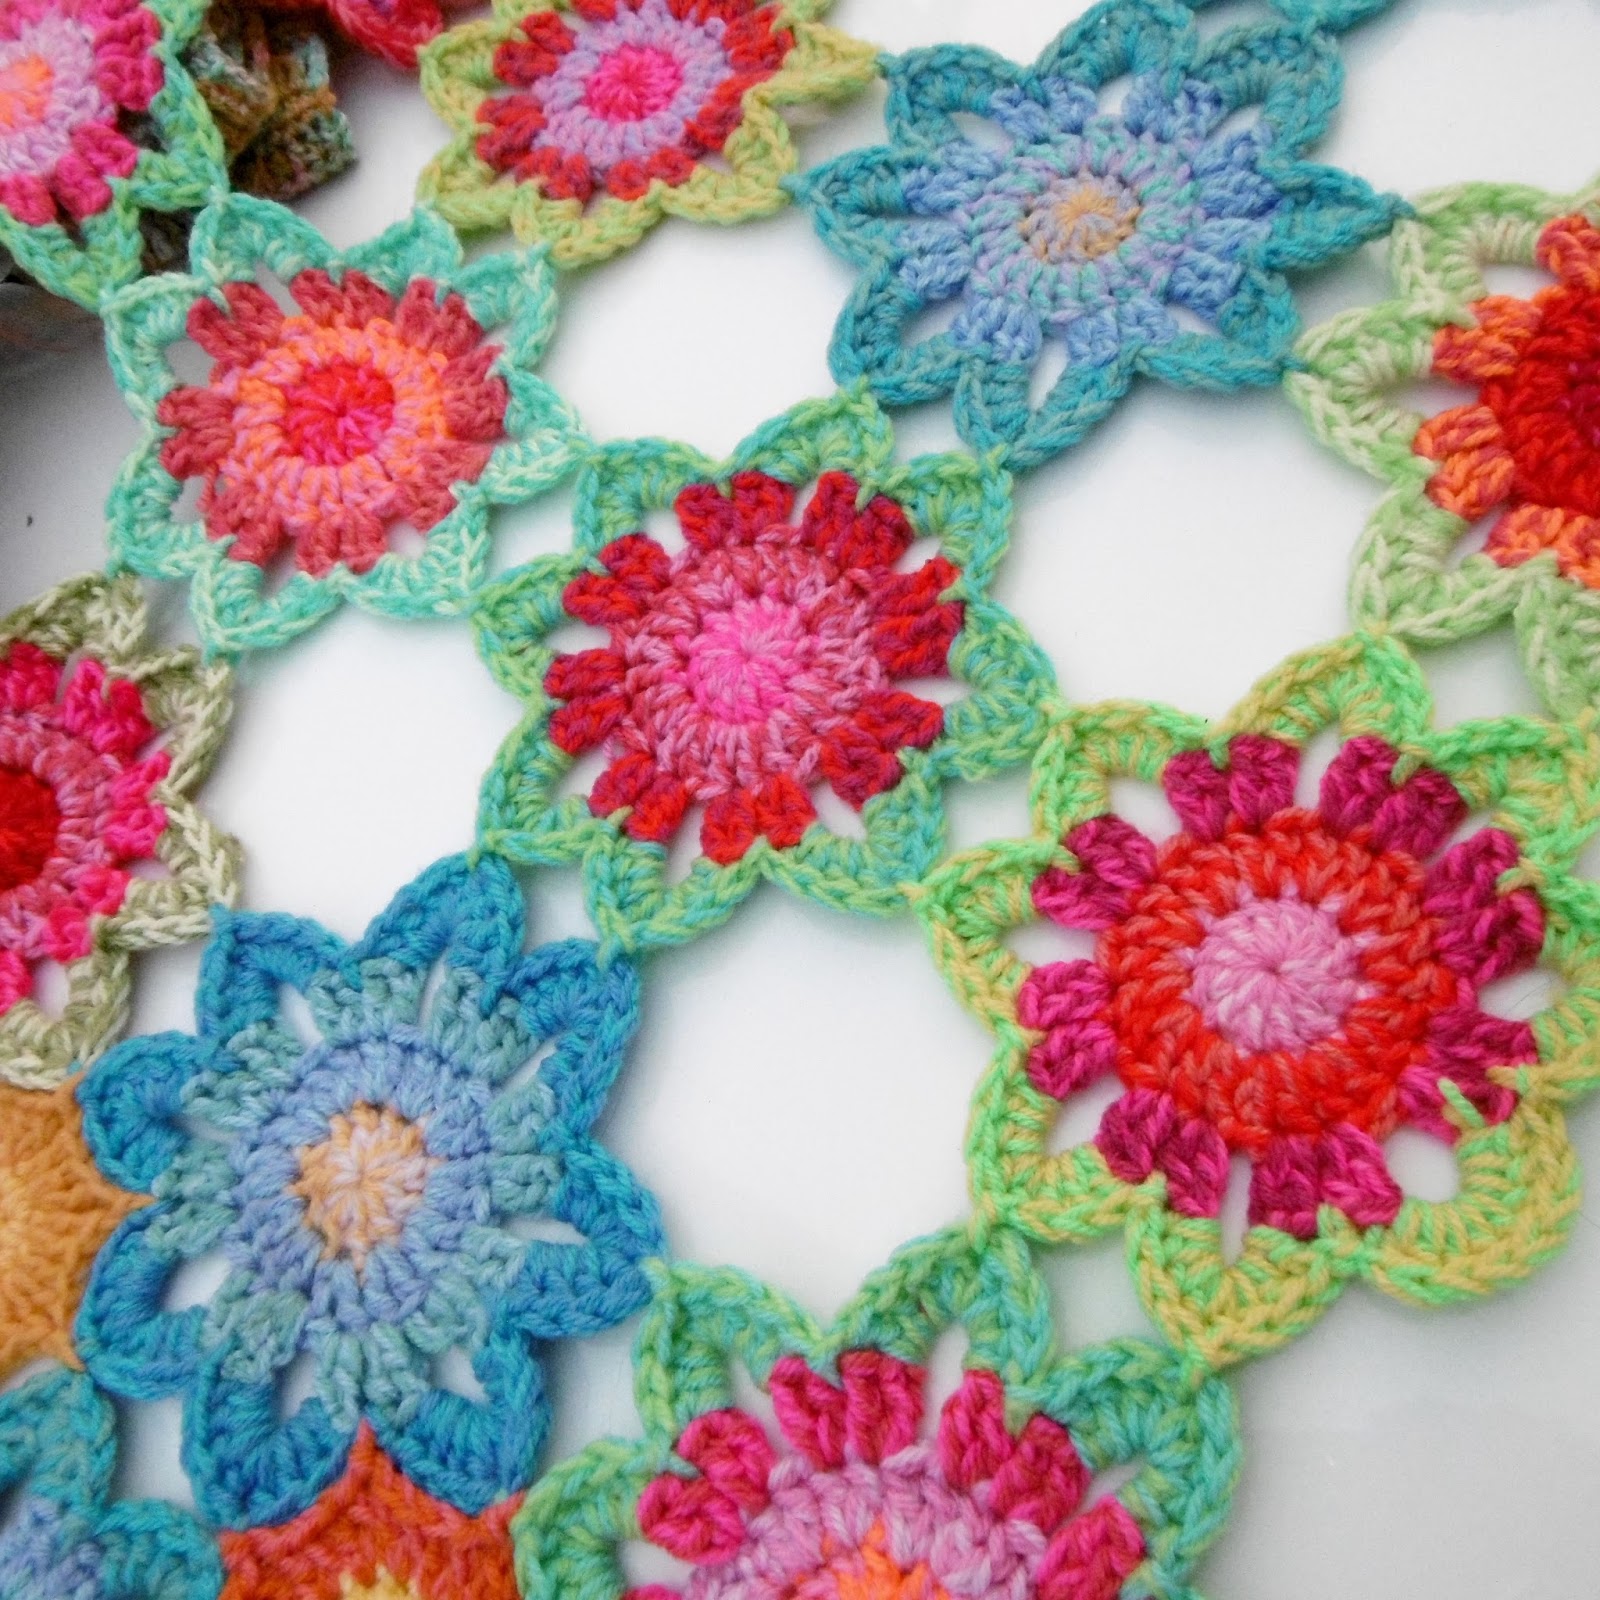
As its a scrap yarn wrap/blanket it will depend on what you have.
OR BLANKET
Love the blanket
and It's made quite a generous size blanket so far.
BASIC RULE OF 12 CIRCLE PATTERN
12, 24,36 dc in each round will give you a perfect flat circle for this pattern it doesn't matter which stitch you start in
Make 9 in each set of colours, to make a wrap the same as mine.
But, you could use one of the sets of colours if you prefer
or make them all mixed up instead of in blocks of shade of one colour.
Joining is done in one colour, but it could just as easily be made in lots of colours too say all the different shades of neutral instead of just one colour black, charcoal, grey, silver, oatmeal, cream or even navy of brown....just have fun with colour for this one and stash bust too.
PATTERN:
5mm hook and ARAN yarn
4mm hook and DK yarn, slightly smaller circles.
US Terms
Shades of Reds/Pinks/Oranges for the wrap...
Shades of purples
Shades of green
Shades of Blues
Shades of Rust/orange
CIRCLE PATTERN
3 Round circle in 3 shade of one colour
Finger wrap of 4 wraps.
ROUND 1: cont. in same col. [ch2 counts as first dc], 12dc into circle wrap, sl st to complete
ROUND 2: [ch2 counts as first dc] 2dc in each st, sl st to complete. [24dc]
ROUND 3: [ch2 counts as first dc], 2dc in first st, 1dc in next st work alternate 2/1 to end of round, sl st to complete.
Set to one side or keep safe on a ring. We will be making all of the 9 blocks first before we lay them out and join then together.
YARN NOTES:
The Tweed yarn I am using I think is the Hayfields Aran, it was 400g ball, I had from my local wool shop, unfortunately i cant find it on the web site and i've lost the label so not sure, its a scrap yarn project so be inventive.
Black/grey Tweed yarns: Hayfields Aran Tweed, Woodcraft Aran [this is quite a dark one], James C Brett, Marble too in the black and grey would work and Scheepjes Secret Garden in col. 710 Stepping Stones.
So lots of black and white black and grey yarns for the back ground to pick from.
or mix your own with 2strands of a thinner dk.
Just work the two strands together to make one tweed yarn
Black and grey [softer] or black and white [slightly more dramatic], both work well.
3 options to try
JOINING CIRCLES TOGETHER
After making your 3 shade circles in chosen colours you will need to decide on a wrap or blanket....
Wrap: a long row of 6 blocks [9 motifs in each colour] over 6' long
or
Blanket: 3 rows of 3 colours side by side
so one more colour to come and you will be going them together
JOINING THE CIRCLES TOGETHER
Lay out your 9 x 3 round circle in the colour group so you know which one is next to each other
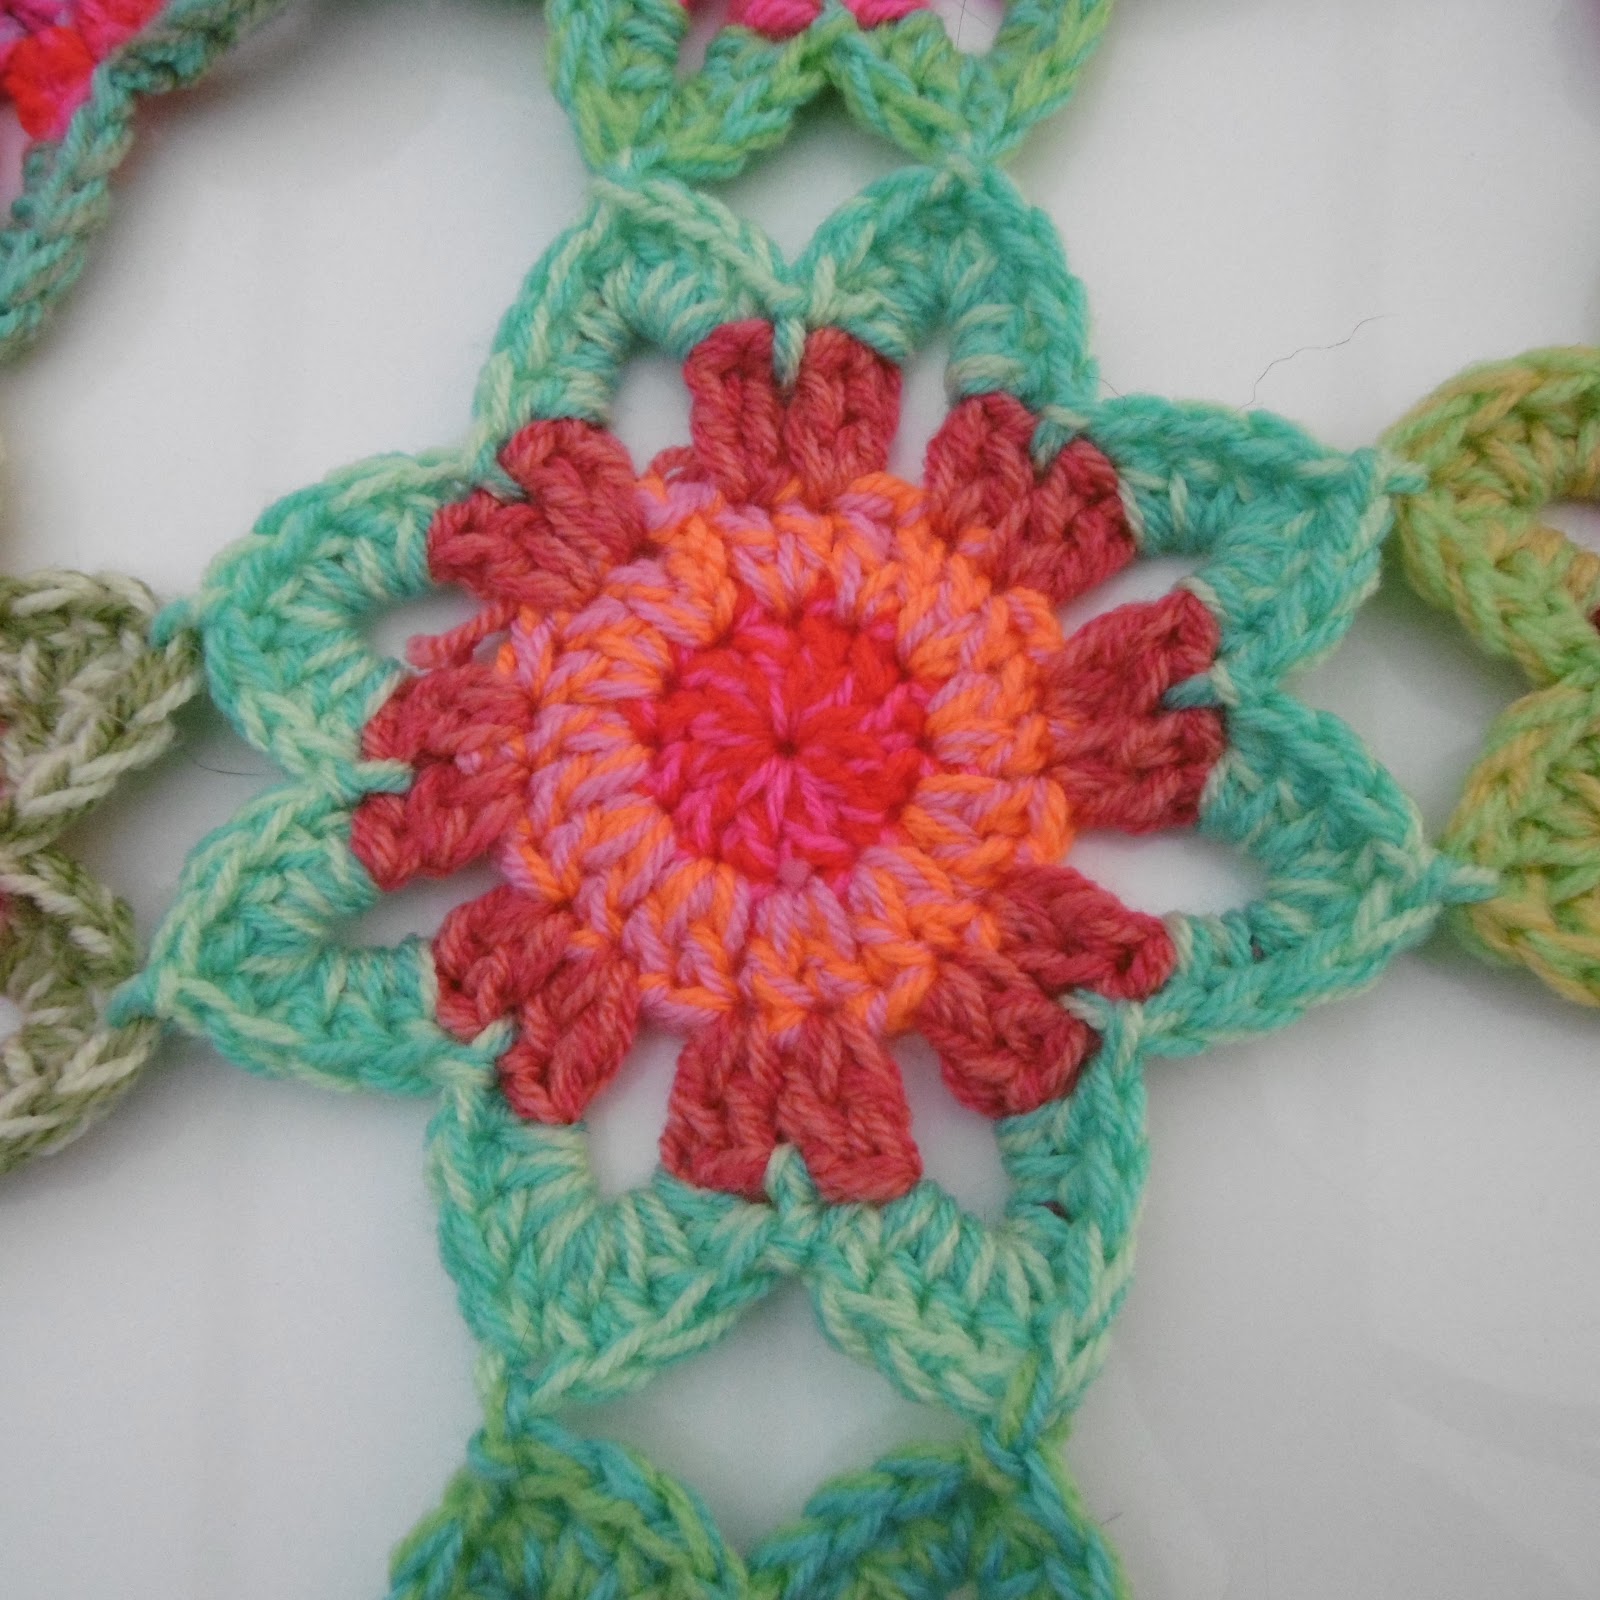
Att. joining yarn in any stitch, ch2 counts as first dc, 1dc in next 2 sts, ch3 1dc in next 3sts, ch3, repeat to end sl st to complete [ 12 X 3dc, 12 x ch3 loops]
join with a sl st replacement for the middle ch st, work from top down hook the yarn and pull through both the ch3 loop and the st to att. 2 squares together as picture below, join 2 loops together on each join
When the first circle is complete then join the next one to the first one using a replacement sl st for the 2nd ch st in the 3ch sts, as above.
Join 2 ch3 loops together on each side as below
Join the circles in 3 lines of 3 motifs
leaving one ch3 loop free between each join of 2, ch3 loop, on each square.
Make sure you do leave one ch3 loop free when joining them in rows of 3
you must leave one ch3 loop free on each side for the in fill squares as below picture
so that you have a square with 4 loops x 3ch, one on each side ready to join the infill squares in PART 7
join together with 2 loops on each side leaving one loop free between joins
MINI INFILL SQUARE PATTERN
the infill squares that pull the whole piece together and give you the almost complete design.
The joining together of the circles has left a square between each circle and you should have a free ch3 loop on each side of the square "hole" that needs to be filled. I did try all sorts of shapes and filing the complete hole too but my favourite is the one i'm sharing with you today and i feel it gives you a lovely secondary pattern.
INFILL SQUARES PATTERN
US Terms
Finger wrap of 4 wraps,
ROUND 1: ch2, counts as first dc, 2dc into circle, ch1 sl st into the first ch3 loop of the "hole' ch1, 3dc into finger wrap, ch1 sl st into the next ch3 loop on the second side of the "hole", repeat until the square has been joined to all the 4 sides of the 'hole' sl st to complete. [12dc, 8ch sts, 4 sl st.]
Sew off all the ends securely, just the picot edging stitch to come next and that will be at the end of the week so this mini cal will end.
EDGING STITCH
The edging stitch has ch5 picots at every ch3 sp, the first and the last picots are joined together to 'straighten' the sides a little.
pictures above and below is the joined ch5 picots that fill in the 'dip' and make for a straighter edging
ROUND 1: Att yarn in the second ch3 sp on any corner, 2sc, ch5 picot, 2sc in same ch3 sp, sc in next 3 sts, 2sc, ch5 picot 2sc in next ch3 sp, repeat for the next 4 x ch3 sps,
sc in next 3sts, into dip, sc into centre join sp, sc, in next 3sts, of next octagon,
2sc into first ch3 sp, ch2, use the next ch st as a sl st into the last picot loop of the previous octagon ch2, complete the picot, s2sc into same ch3 sp, sc in next 3 sts, 2sc, ch5 picot 2sc in next ch3 sp. repeat to end
Always joining the last and the first picots together to form a triangular join between octagon motifs
this will 'straighten the sides a little.....
JOINING THE OCTAGONS TIP:
replace the middle ch st and do a sl st into the last picot to join them together then continue to finish the first picot as usual
first and last picots joined
Love this edging to the wrap, tried it on the blanket and it doesn't work so there will be another edging for the blanket next week
Some pictures of the blanket so you can see that it's not working on a large area blanket. It needs something far deep maybe a couple of inches adding.
I don't think i will be unpicking whats been done, but adding to the edging stitch already there.
Love the blanket though just needs more inches!
It's made quite a generous size blanket so far.